2. Setting up the environment of nextnanopy
We will utilize the nextnano++ simulator with nextnanopy, a Python package that interfaces with all the solvers from nextnano.
This section guides you through the process of installing the necessary packages and configuring the environment for nextnano simulations. Additionally, it covers the installation, activation, and configuration of the nextnano license.
2.1. Setting up the environment
To run nextnano simulations with IPKISS, two Python packages are required: nextnanopy and jinja2. The latter is an open-source Python module, while nextnanopy is specifically designed to automate nextnano simulations and analyze the results. To avoid potential conflicts with dependencies in the IPKISS environment, it is essential to create a new Python environment. The code provided in this example utilizes this Python environment transparently for running a simulation with nextnano.
Open the IPKISS terminal through the Luceda Control Center and create a new environment for nextnanopy:
conda create -n nextnano python=3.11
Activate the nextnano environment:
# WindowsC:\luceda\luceda_2025120\condabin\conda.batactivate nextnano # Linux$HOME/luceda/luceda_2025120/condabin/condaactivate nextnano # MacOS~/luceda/luceda_2025120/luceda/condabin/condaactivate nextnano
With the nextnano environment activated, proceed to install the required packages:
conda install jinja2
python -m pip install nextnanopy==0.1.22
The nextnano environment will be used by default for running the simulations.
2.2. nextnano installation and license activation
Before starting the design and simulation tasks, it is crucial to ensure that the nextnano license is properly downloaded and activated. Please follow these steps:
Contact nextnano’s support team to obtain the license for the nextnano++ package.
Download the recommended version of nextnano following the link: nextnano Download Page (the version released on 2023-08-07).
Once you have obtained the license from nextnano, proceed with the license activation:
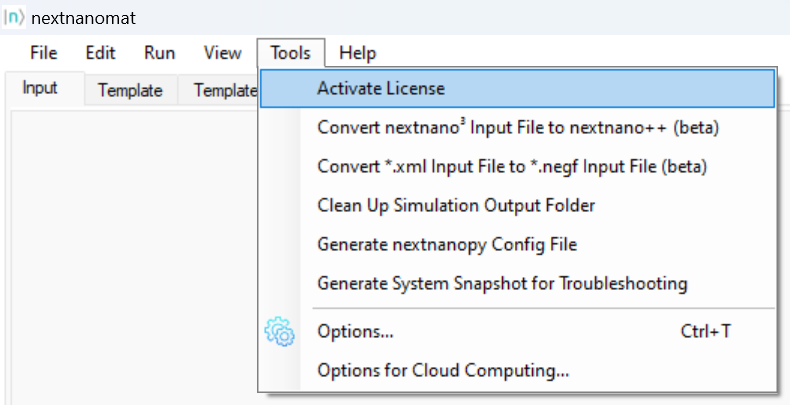
Open the nextnanomat window and navigate to Tools > Activate License.

Activate nextnano license in nextnanomat.
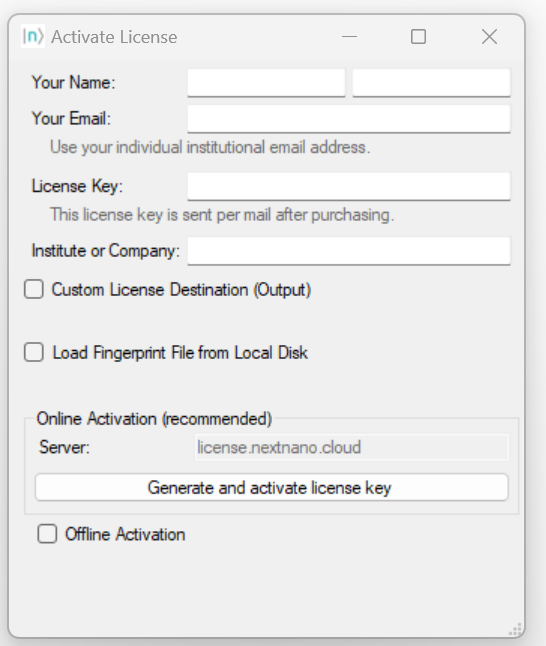
In the activation dialogue, enter the license key and other required information, then click Generate and activate license key.

License activation dialog, you have to fill in all the required information.
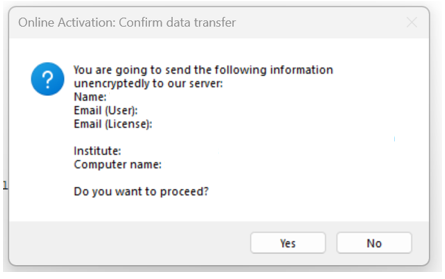
By clicking Generate and activate license key, your hardware fingerprint will be sent to nextnano’s license server and you will instantly receive all license files associated with your nextnano license key. Confirm by clicking Yes when prompted.

Confirm data transfer during online license activation. After activating, you can check all the license files in your local directory.
Finally, you need a configuration file to execute nextnano using nextnanopy. Please follow the instructions on the website to set up your local configuration file: https://www.nextnano.com/documentation/tools/nextnanomat/main_menu_functions/gen_nnpy_config.html
In this tutorial, we will be using nextnano++ as well as nextnano3, so please make sure you set the correct path to nextnano++ and nextnano3 in the .nextnanopy-config.
By default the config file needs to be located at your home directory (for example: C:\User\User_name\.nextnanopy-config).
Once the nextnano license is installed and the configuration file is set up, we can open the pycharm project: nextnano_eam_simulation in luceda_academy/training/topical_training and run the file: example_build_simulation_1D_EAM.py.