Installing Design Kits
In IPKISS, Design Kits (DK) are distributed as zip-files. They contain different folders and files, ranging from documentation to technology settings and components. Your designs are built on top these design kits and therefore they need to be configured on your computer for IPKISS to work. DKs can be installed and configured for your project in two ways, global installation, or project-based installation.
Global installation is done through the Luceda Control Center. This is the most straightforward and easy way to get started with design kits in your project. Especially when you only use a few design kits that you want to be available across multiple projects. If you require more flexibility and prefer your design files and DKs to be stored in specific locations, then we recommend project-based installation of design kits.
Global installation
As an example, we illustrate the global installation process using the Aluvia PDK. This method works for all PDKs supported by Luceda. The following steps describe how you can install a Design Kit via the Luceda Control Center (LCC).
Downloading the Aluvia PDK
The Aluvia PDK is freely available from our website here.
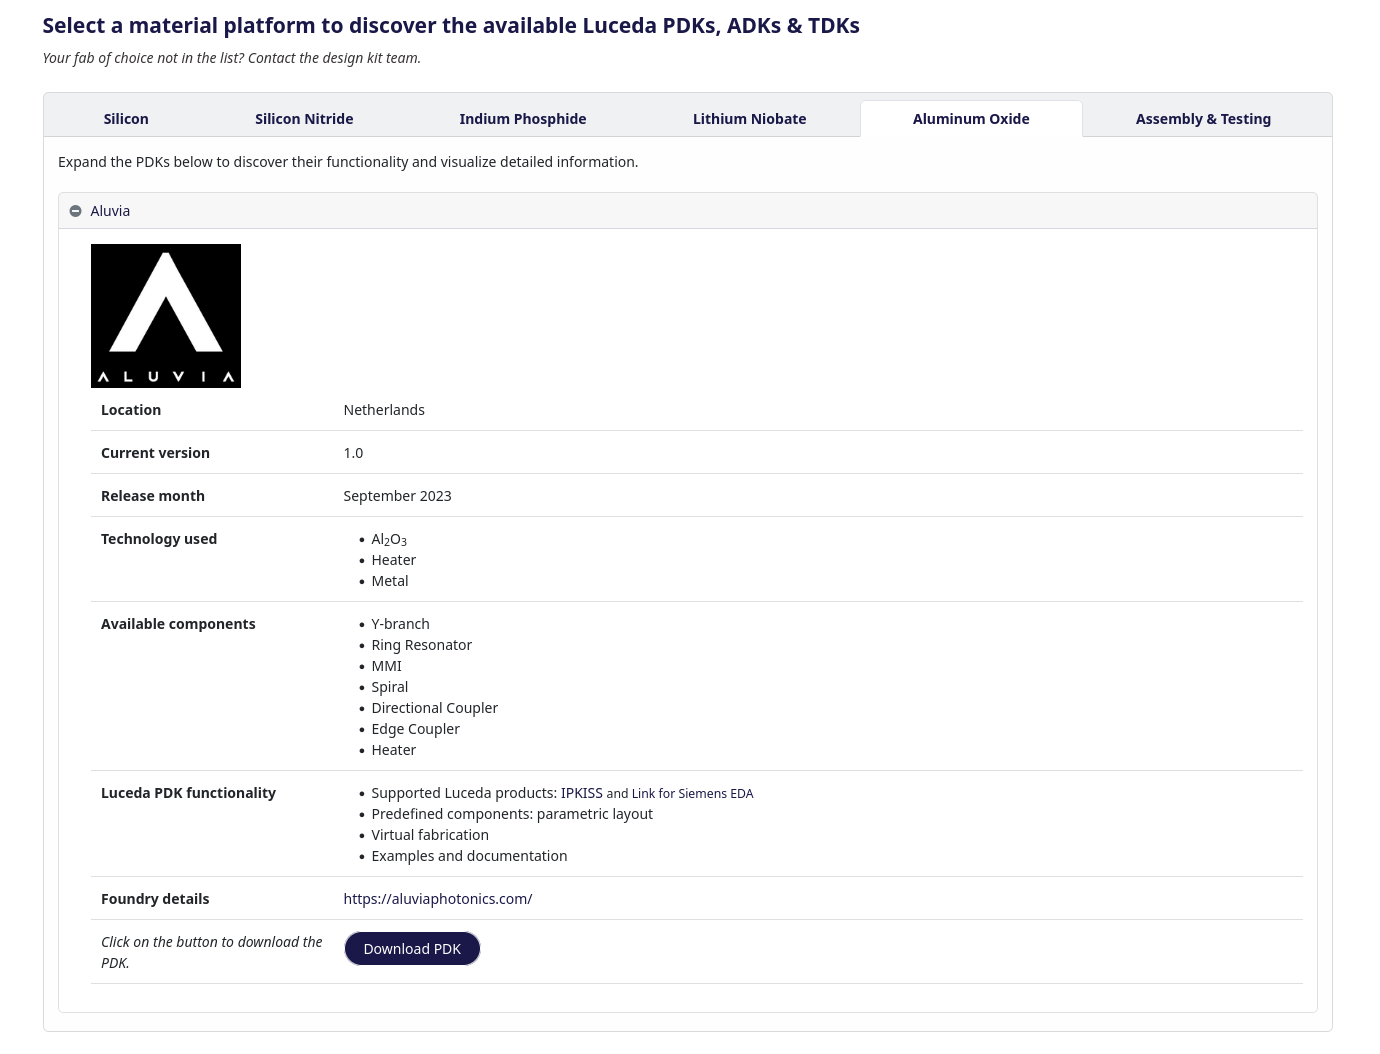
Design Kits on the Luceda Photonics website
Follow the link, then click Aluminum Oxide and expand the Aluvia tab. Click Download PDK to download the PDK, preferably to your Downloads folder.
Launch Luceda Control Center
There are a few options to do this and they are mentioned in the getting started. In general, you can launch LCC from the start menu (make sure you choose the correct version if you have multiple versions of Luceda IPKISS installed). Now open the Design Kit tab. If you have never added DKs before, it should look like the image below:
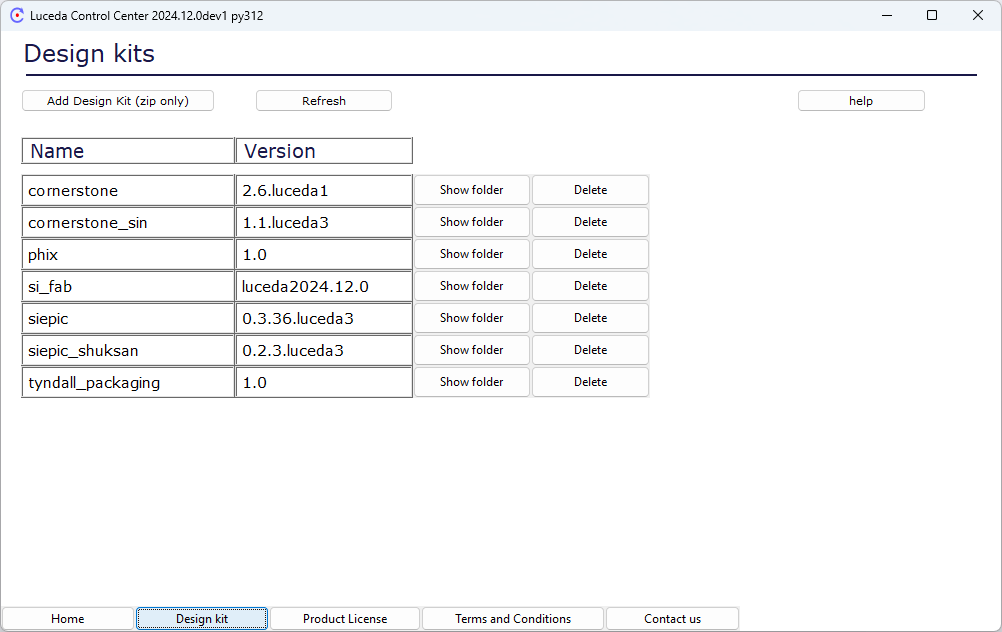
Design Kits tab in LCC
Install the PDK
By clicking on the Add a Design Kit button, you will open the Downloads folder, where you can select the Aluvia PDK zip-file. The PDK is installed correctly if it shows up in the Design Kit list. If you want to view the content of the PDK, you can click the Show Folder button next to it.
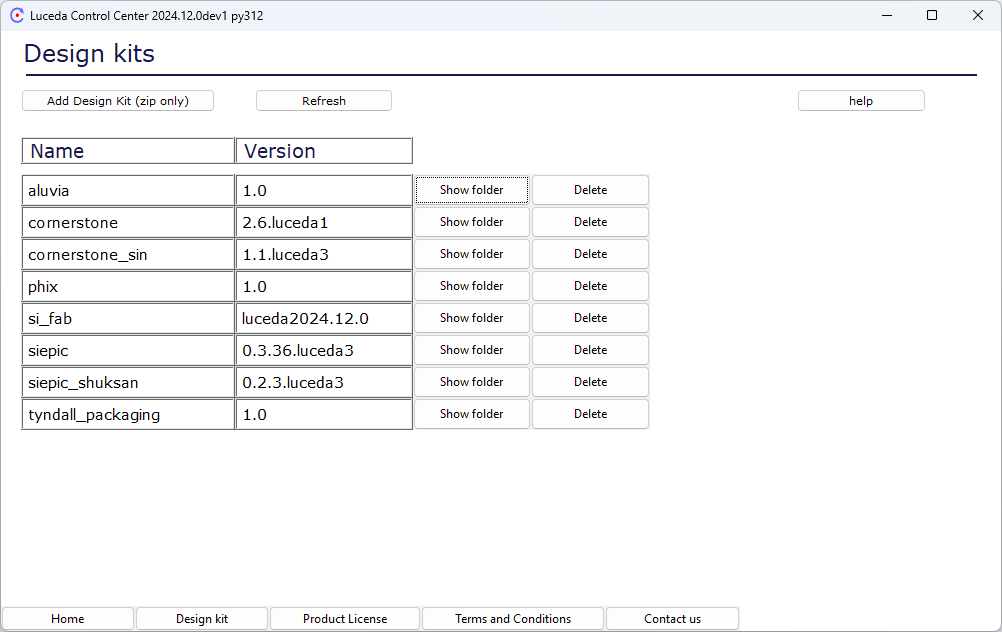
Aluvia PDK installed correctly
Using the PDK
Now that the PDK is installed, it can be used in any Python file in the IPKISS environment. Code completion is also available in most editors, it means your code editor knows what is inside a design kit and it can make suggestions for the names of components technology keys and much more. A restart of your code editor after installing a new design kit might be required to allow code completion to work.
You can import the PDK as shown below:
import aluvia.all as PDK
Deleting the PDK
In order to uninstall the PDK, click the Delete button next to it. This will remove the Aluvia PDK.
Note
You should never modify the files inside your foundry design kits (PDKs, ADKs, TDKs) because they constitute the foundation of all your designs. Tampering with it can result in unexpected behavior or invalid designs. Instead, you can create a new library on top of a foundry design kit. This way you can build on top of the foundry’s technology to add new components and your custom technology settings.
Project-based installation
A project-based configuration is comprised of storing the design kits in custom locations and configuring your projects individually to use design kits from those locations. In order to configure your project, you have to manually add the location of the Python packages in the design kit to the PYTHONPATH of your Python environment. This process depends on the tools you use. To illustrate how to set up a project with PyCharm and our demonstration PDK SiFab, please follow the instructions below. Here we have chosen to store the PDK in the project folder as well.
Create a folder in your project
First we need to look for the SiFab PDK and copy-paste it in a new folder named ‘pdks’. SiFab is by default installed alongside with your IPKISS installation. You can find the SiFab PDK by opening Luceda Control Center, open the Design Kit tab, search the SiFab PDK and click the Open Folder button next to it.
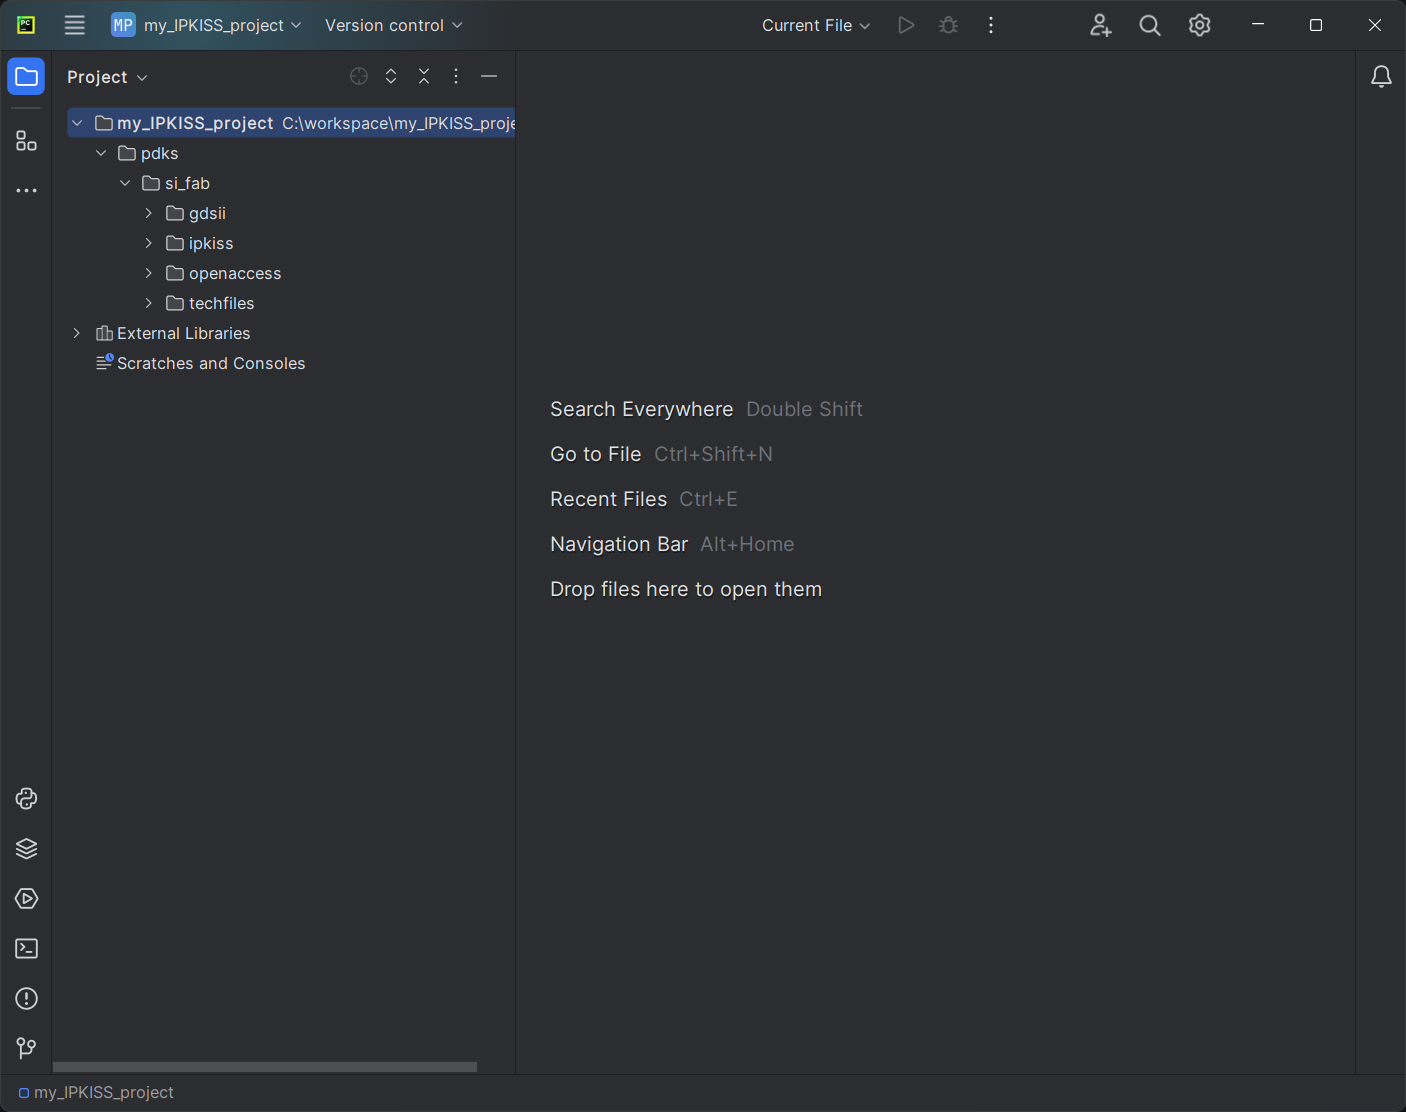
Add the si_fab PDK to your project.
Add the PDK to PYTHONPATH`
Now we have to edit the PYTHONPATH to let Python know where to look for the PDK. Go to . Navigate to the ipkiss folder inside the PDK and mark it as source. The folder should turn blue.
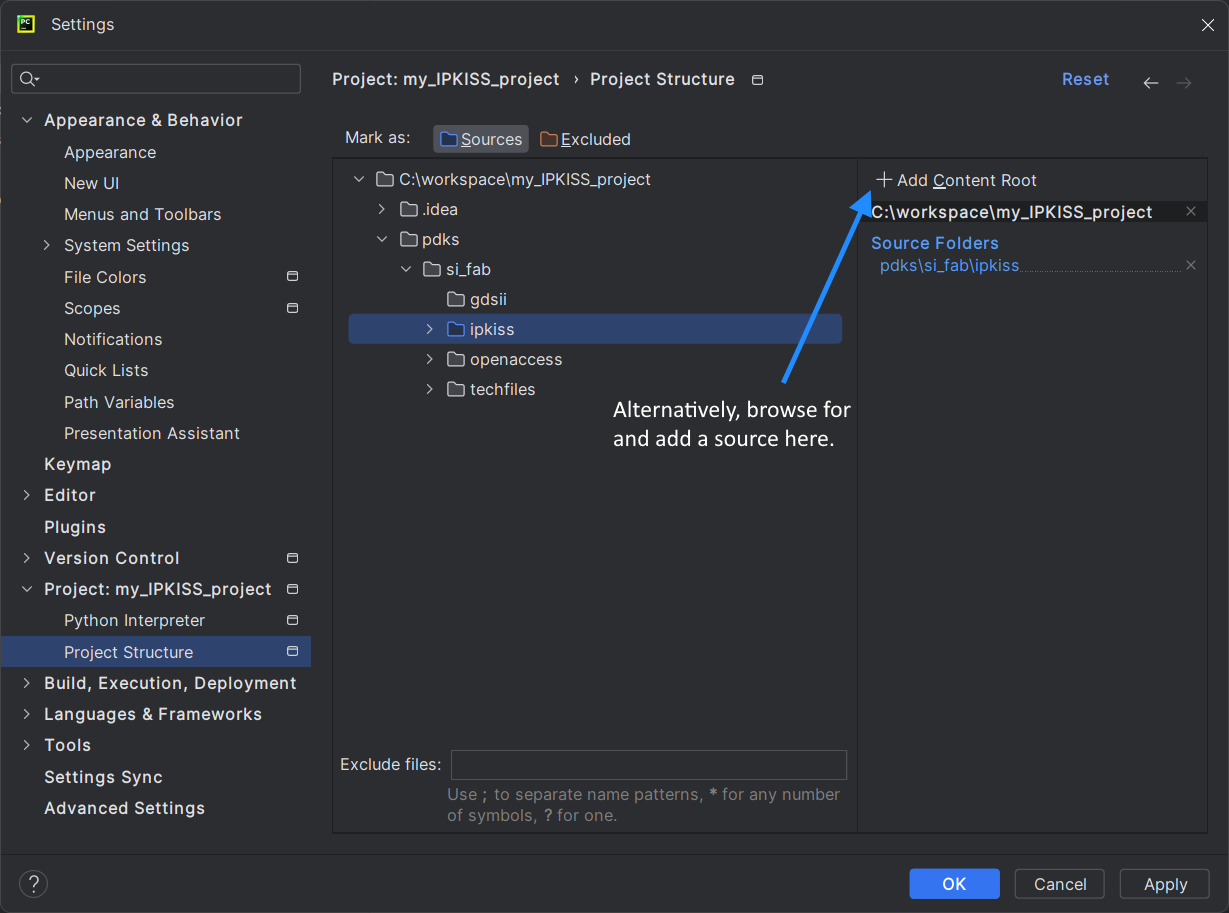
Add the si_fab PDK to PYTHONPATH.
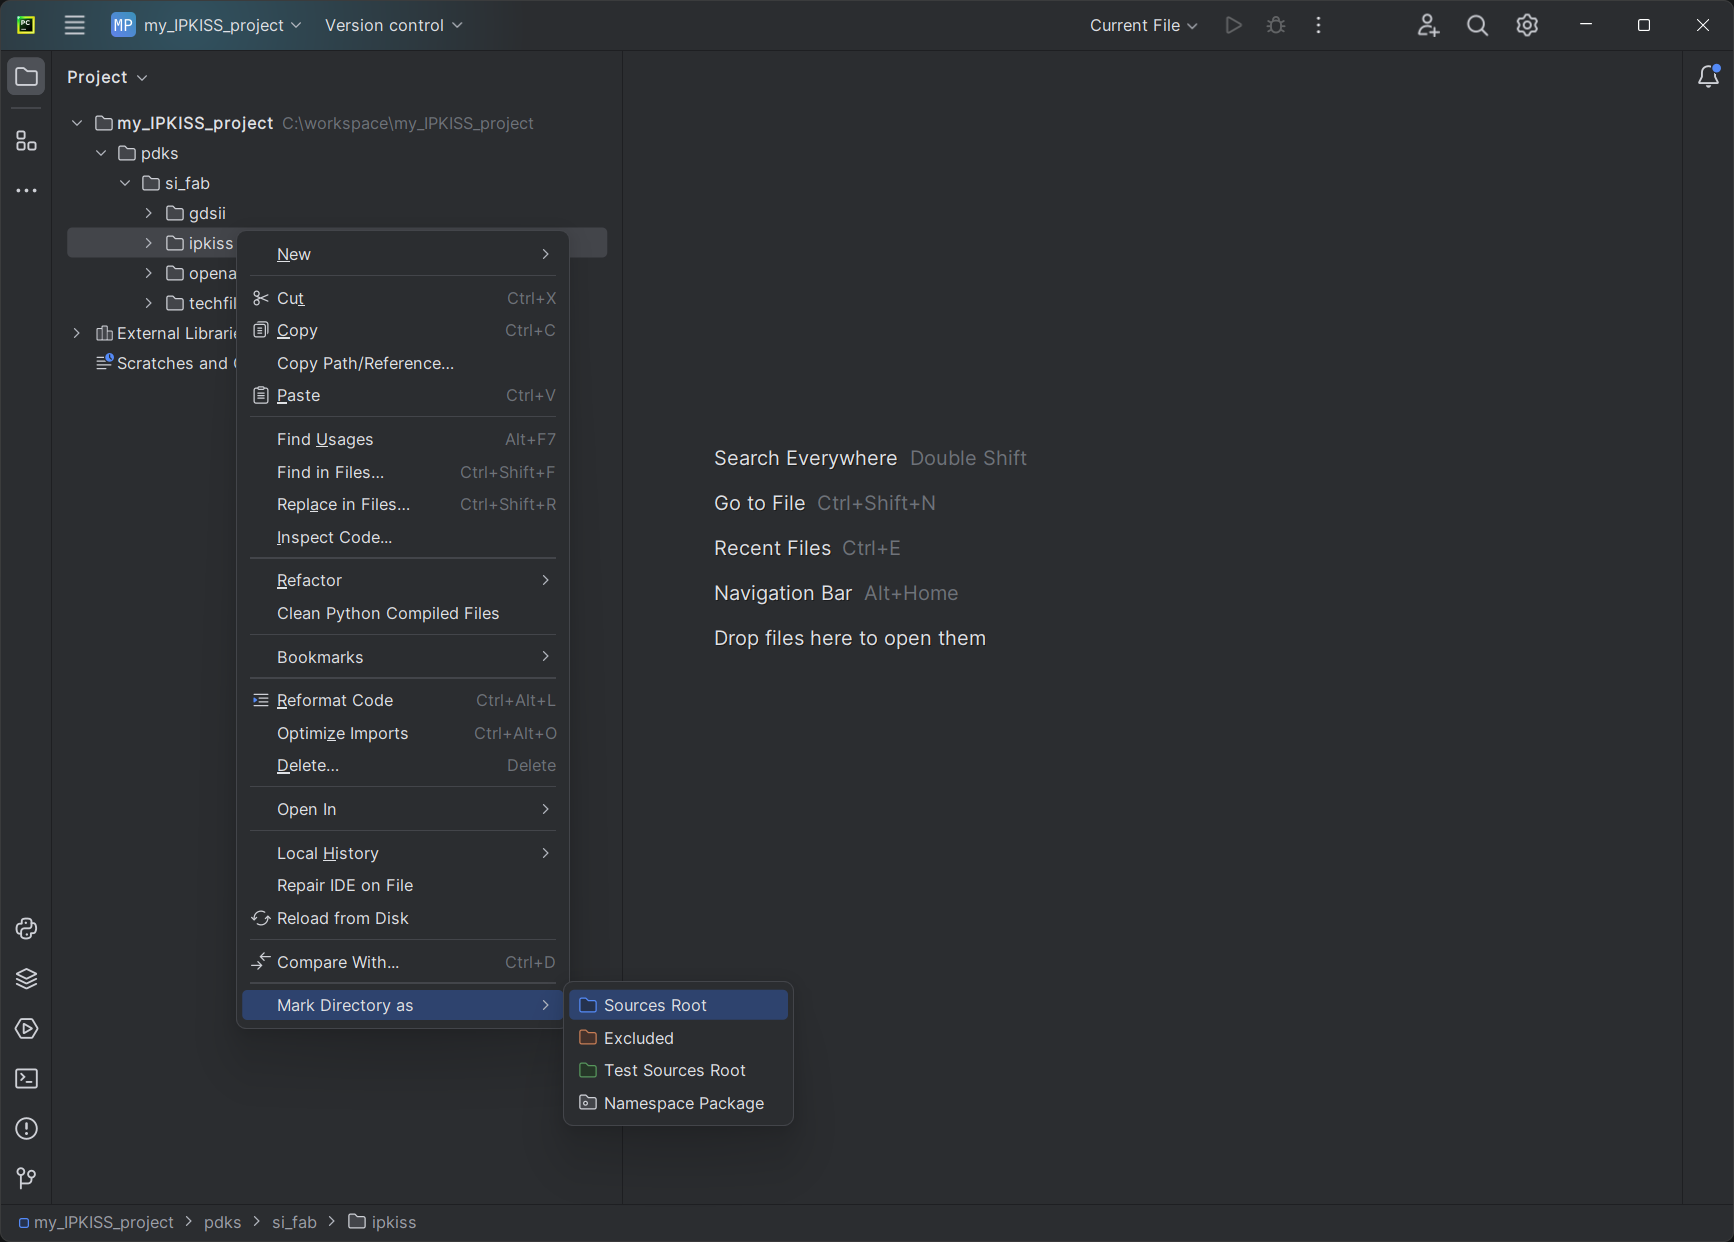
Or add the si_fab PDK to PYTHONPATH through the right click menu.
Using the PDK
In your project, you can now start using this PDK in your scripts.
import si_fab.all as pdk
import ipkiss3.all as i3
Repeat this process when you create a new project.
Note
When importing a design kit, project-based configurations will take precedence over globally installed design kits.