Getting started: defining tests for a library
This section explains how you can start to write tests to verify the components and circuits in your library:
How to add tests to a library project.
How to define regression tests based on known-good (“golden”, “known to be correct”) reference files.
How to run tests and inspect the results.
How to regenerate the reference files.
Example project
As a simple example project, we will use a new library that contains a single component: a disk resonator. For detailed instructions and an example of how to set up design projects, see Create a new IPKISS design project.
Note
Throughout this documentation, we will use our recommended Python IDE, PyCharm, but you are free to choose your own IDE or to run everything from a command line.
Assume we have an library team_library with a standard Luceda project structure:
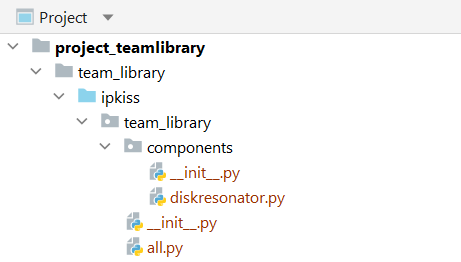
File structure of the team_library project.
The diskresonator.py file contains the model and the PCell for a (naive) disk resonator.
The table of contents of the library in all.py contains only the disk resonator and imports the technology file.
The focus of this manual is on the use of IP Manager, but the example files can be downloaded here:
Next, we want to ensure that mylibrary/ipkiss/team_library and mylibrary/ipkiss/team_library/components are recognized as Python modules.
To do so, create an empty file called __init__.py in both folders.
Adding tests to the library
In order to add regression tests to a library, create a separate directory tests next to the topmost team_library directory.
It will have 3 files for now:
conftest.py: file with settings that are shared between all the tests.pytest.ini: file to configure pytest behavior.test_diskresonator.py: defines the tests on the DiskResonator component.
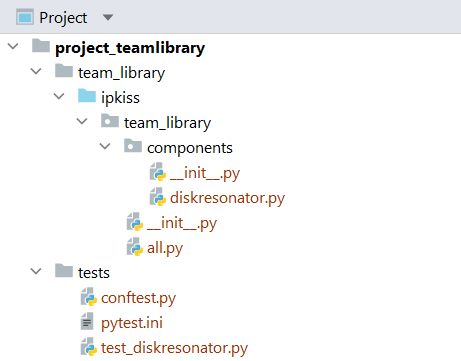
File structure of the team_library project with tests.
The 3 example files can be downloaded here:
Conftest
The conftest.py file will be read by pytest everytime tests are run in this directory and those below.
It can contain declarations and definitions that are common to all tests.
We use it to specify which PDK technology needs to be loaded to execute the tests.
# pytest configuration file
import pytest


# import the technology for testing this library for the full test session


@pytest.fixture(scope="session", autouse=True)
def TECH():
    import si_fab.all as pdk  # noqa
    from ipkiss.technology import get_technology

    TECH = get_technology()

    return TECH
This is done by means of a pytest fixture. A fixture is data or dataset which is calculated before the tests that depend on it are run/ Pytest ensures that functions marked with @pytest.fixture are called upfront, and passes on the resulting data to the test functions:
import pytest

@pytest.fixture()
def a():
    return {"hello": "world"}


def test_a(a):
    assert a['hello'] == "world"
The TECH() fixture will make a variable TECH available to all tests (autouse=True) and for the whole test session (scope='session').
In this way, we only have to specify it once.
For further information on the conftest file, please refer to the pytest documentation.
Ini file
The pytest.ini is read by pytest everytime it is run on this directory and contains general pytest configuration options.
We use it to export an HTML report of the test results. This is done by means of the pytest-html package which is installed with IPKISS and a plugin provided by IP Manager.
[pytest]
addopts = '--html=report.html' '--self-contained-html'
Define a component reference test
Now, we can start to add tests for the component(s) in our library.
We’ll define the tests for the DiskResonator cell in the file test_diskresonator.py.
Files starting with test_ will be recognized for testing.
To test the layout and netlist of the disk resonator PCell against known-good references, we use the following code:
from ip_manager.testing import ComponentReferenceTest, Compare
import pytest


@pytest.mark.comparisons([Compare.GdsToGds, Compare.LayoutToXML, Compare.NetlistToXML])
class TestDiskResonatorReference(ComponentReferenceTest):
    @pytest.fixture
    def component(self):
        # Create and return a basic disk resonator
        from team_library.all import DiskResonator

        my_disk = DiskResonator(name="my_disk")
        return my_disk
First, from the
ip_manager.testingmodule we importComponentReferenceTest, which is a pytest test class which we’ll use to define a test.Compare, which is an enumeration that contains the different comparison methods (for example,Compare.GdsToGds,Compare.SMatrix, …).
We also import pytest. Pytest is shipped with the Luceda installer and doesn’t need to be installed separately.
Then, we define a class
TestDiskResonatorReference:This test class inherits from ComponentReferenceTest
It has a method (a pytest fixture) component which defines the component to test. In this case we return
DiskResonator. Note that we assign a specific name to the component. IP Manager tests should not rely on the automatic cell name generation of IPKISS, because pytest tests are not guaranteed to run in a specific order. When relying on automatically generated names, tests could fail because of differences in test execution order.This class is marked with
pytest.mark.comparisons(), which is used to define which comparisons to run. In this case, we are comparing the LayoutView to GDS and XML representations, and the netlistView to an XML representation.
The ip_manager.testing.ComponentReferenceTest class implements a range of different tests. Only the tests
defined in the comparisons mark will be run and the others not. These can always be enabled later.
The tests in ComponentReferenceTest are based on known-good reference files that are stored alongside the test. When executing the test, the layout of the component will be compared with the layout stored in those reference files. You can learn more about the available test classes here.
In this case, we specify 3 tests to be run:
Compare.GdsToGds: exports a GDSII file of the LayoutView and compares it with a known-good reference file.Compare.LayoutToXML: exports an XML file of the LayoutView, including port information and compares it with a known-good reference file.Compare.NetlistToXML: exports an XML file of the NetlistView and compares it with a known-good reference file.
In the example you can see we use the decorator @pytest.fixture.
This will ensure that all the tests can use the defined component: before running the test, pytest will make sure the component fixture is executed.
Fixtures are a powerful mechanism, you can learn more about them in the pytest documentation on fixtures.
Note
A test class always needs to start with Test for pytest to recognize it. Similarly, test functions need to start with test.
Generating the known-good reference files
Now, we need to generate (or later, regenerate) the reference files against which ComponentReferenceTest will run.
We create a separate script file to do this, located in the tests directory.
# Regenerates the reference files for the tests in this directory
# Use this file to generate the reference files for the tests.
# Be careful when using this function: it will overwrite all reference files if they already exist.
# When the reference files already exist, and tests are failing, make sure to compare the generated files
# against the reference files to spot for (un)expected changes.

from ip_manager.testing import generate_reference_files

generate_reference_files()
The example file can be downloaded here:
The generate_reference_files function will (re)generate the known-good reference files for
all the component reference tests in the tests directory.
If you run this script, the following output is given:

Output of generate_reference_files()
After generating the reference files, the tests are run in order to check that the generated reference files and the in-memory description indeed match up as expected.
The reference files are stored in the ref directory:
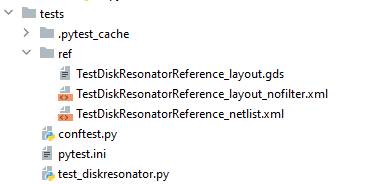
The generated reference files
Instead of generating the reference files for all tests, you can also specify a directory or a python module explicitly. For example:
generate_reference_files("C:/team_library/tests")
generate_reference_files("C:/team_library/tests/test_diskresonator.py")
Note
If the reference files already exist, generate_reference_files will overwrite them without warning. Hence be careful! Only run it if you are sure you want to overwrite your known-good files.
Inspecting reference files
After (re)generating the reference files, you’ll want to check them so that you’re sure that these are the known-good files.
The XML files can be opened from PyCharm:

The netlist XML reference file
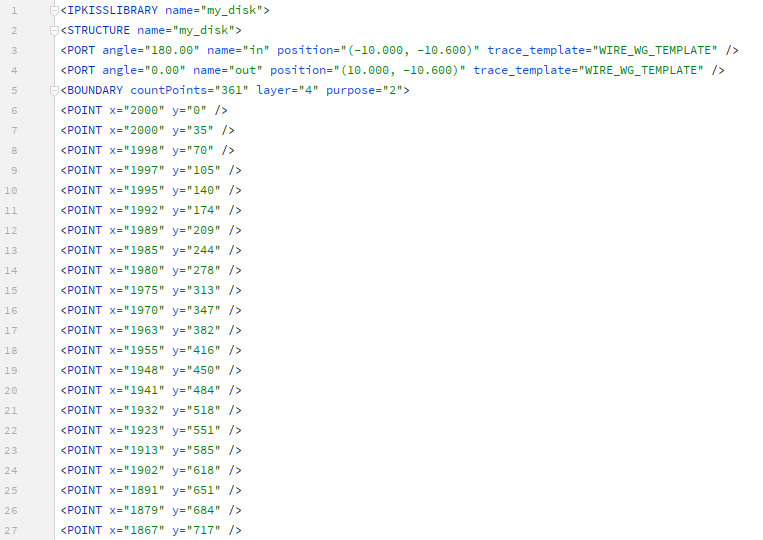
The layout XML reference file
The GDSII file can be inspected in your favourite GDSII viewer:
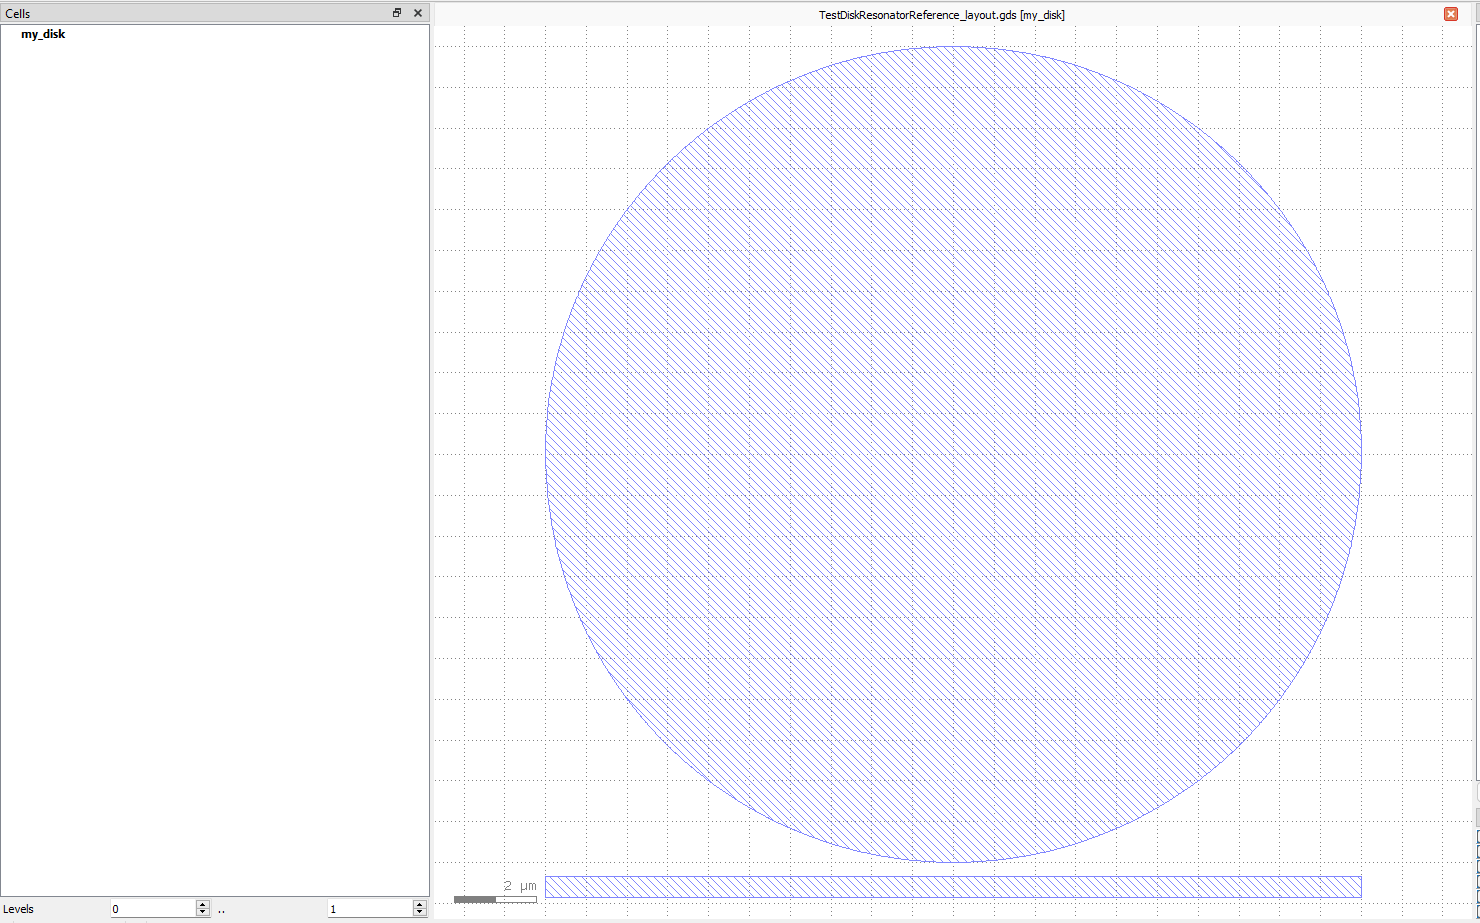
The GDSII reference file
Running tests
After defining the tests and (re)generating and checking the reference files, we’re now ready to execute the tests.
First, we need to ensure that pytest is selected as the testing framework for your PyCharm project. From the File menu, launch the Settings dialog and navigate to Tools and then Python Integrated Tools. Under Testing, select pytest as the default test runner:
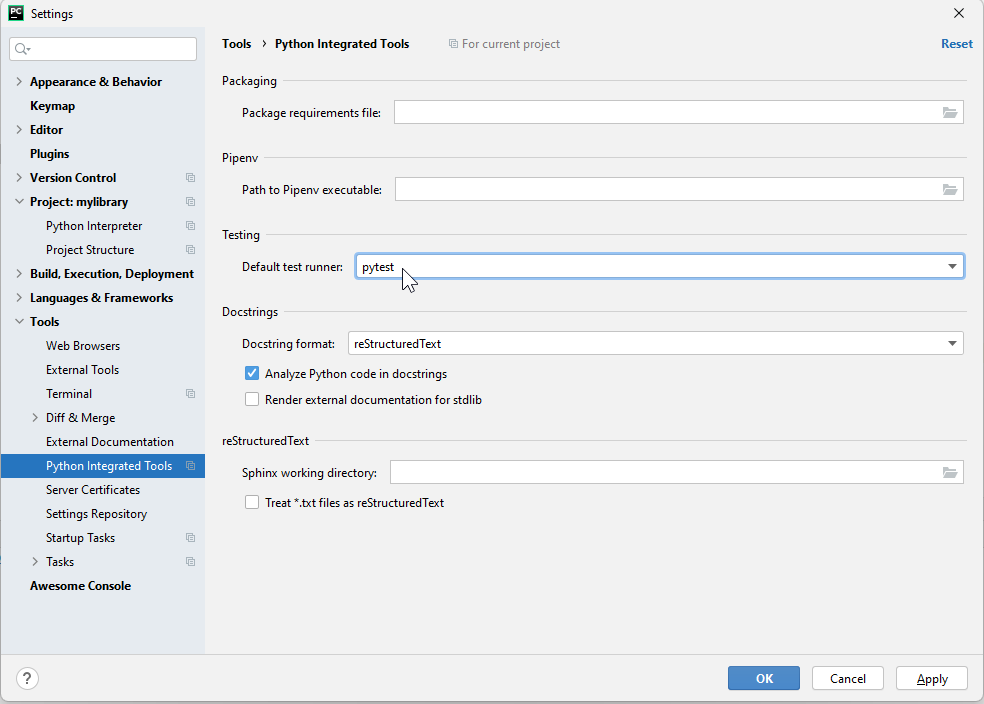
Set pytest as the default test runner in PyCharm.
Now, make sure to have the test_diskresonator.py file open. Then, from the PyCharm Run menu, select Run… and then pytest for test_diskresonator or pytest for test_diskresonator.TestDiskResonatorReference.
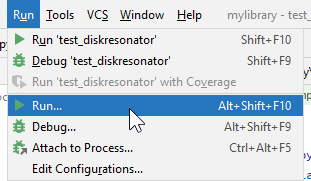
PyCharm Run menu.
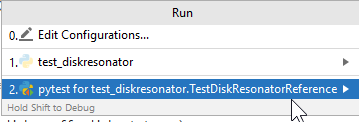
Run pytest on the file or test in the file.
The pytest window in PyCharm should now become visible and show the status and results of the test execution:
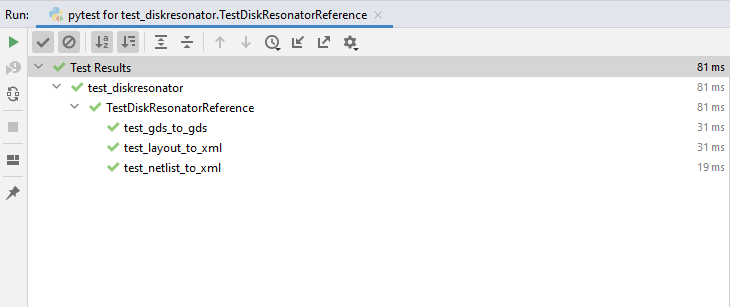
Test status and results in PyCharm.
The output of pytest is also captured and can be browsed:

Pytest output in PyCharm.
In order to simulate a regression in the PDK, you could modify the test as follows:
@pytest.mark.comparisons([Compare.GdsToGds, Compare.LayoutToXML, Compare.NetlistToXML])
class TestDiskResonatorReference(ComponentReferenceTest):
    @pytest.fixture
    def component(self):
        # Create and return a basic disk resonator
        from team_library.all import DiskResonator
        my_disk = DiskResonator(name='my_disk')
        my_disk.Layout(disk_radius=11.0)
        return my_disk
If you now rerun the tests, you will see that the layout tests have failed:

Failed tests in PyCharm.
When you select a test, e.g. test_layout_to_xml, you will get the pytest output for that test. IP Manager lists the differences between the XML files in this case:
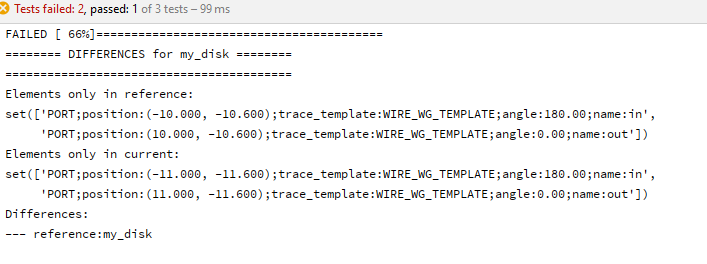
Difference between XML files.
If you need to dig deeper, you can also manually inspect the differences between the temporary files that have been exported by IP Manager and the known-good reference files:
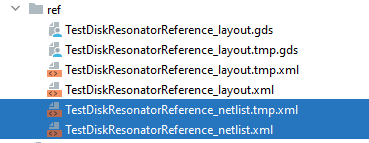
Temporary files are generated next to the reference files.
Running pytest can of course also be done from the command line. You will get the full output in the command window in that case.
pytest test_diskresonator.py
HTML output
If HTML output was configured in pytest.ini, then a report.html file will be generated.
The name of the HTML file can be configured in
pytest.ini. More configuration details can be found in the pytest-html documentation.The file will be saved in the directory from where pytest was run. In PyCharm, this can be the folder where a selected test file is located or the topmost containing the tests if a group of tests was selected.
You can now open the file in a web browser, or using the HTML preview in PyCharm:
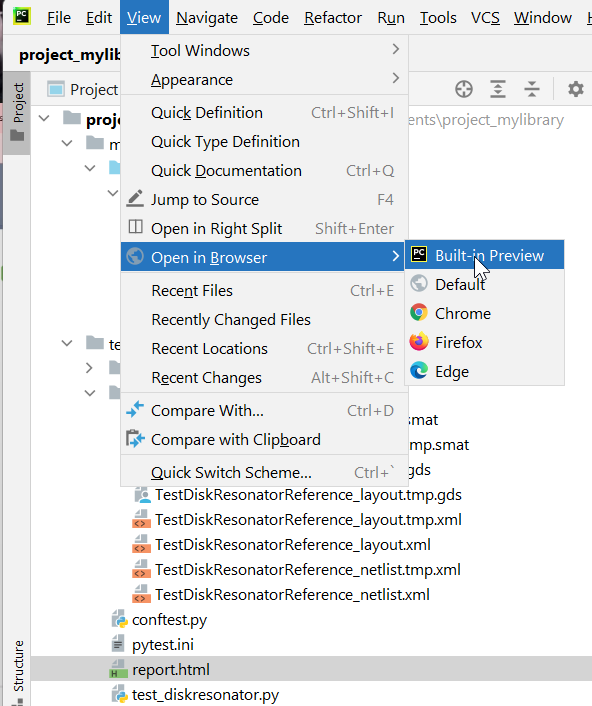
Launch HTML preview in PyCharm
The HTML gives an overview of all the passed and failed tests:
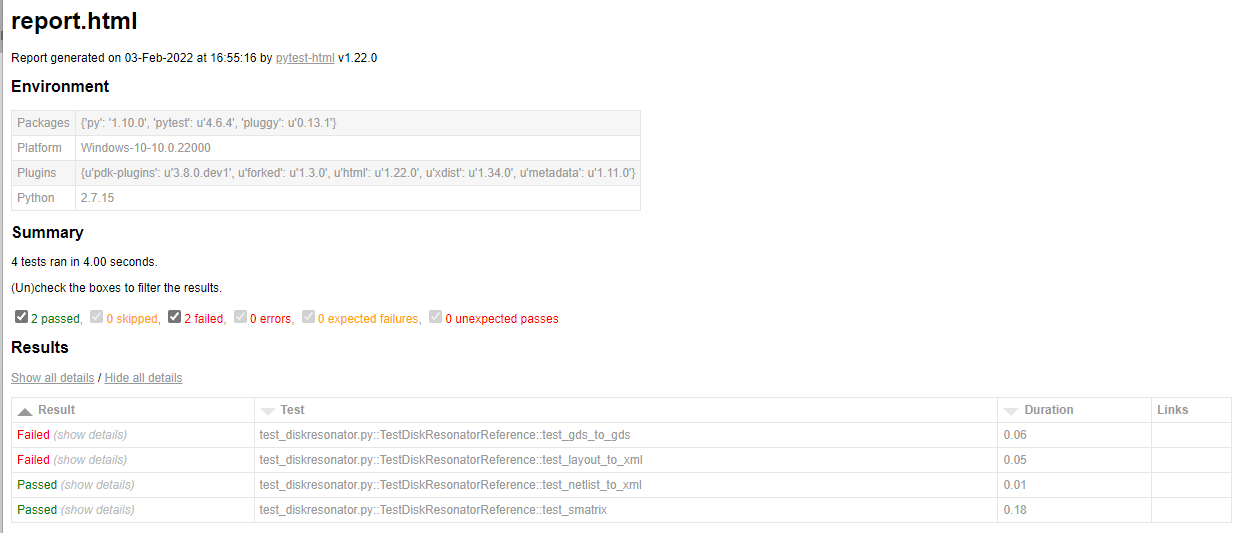
HTML report of the tests.
For each test you can look at the detailed output:
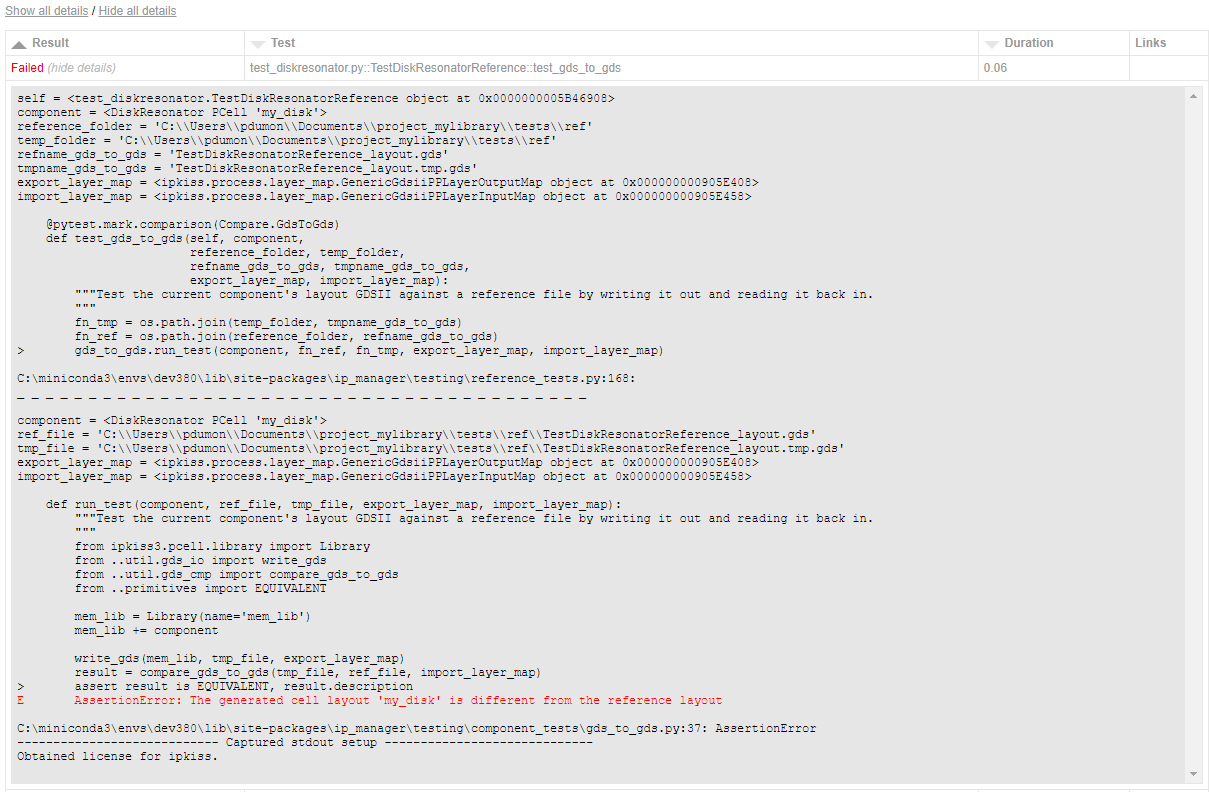
HTML report of the tests: details of a test.
For failed SMatrix reference or CircuitModel tests, the ip_manager plugin will automatically insert plots of relevant S-matrices. For example, for a circuit reference test (comparing the s-matrix), the two scatter matrices will be plotted together. For other high-level tests, the current S-matrix will be shown.

Example report page with transmission spectrum report
This HTML output can help you considerably in your workflow.
Changing library components or their tests
When you change - intentionally or unintentionally - a component or its test, you will re-run the tests. The tests that capture the change (e.g. in layout, model, …) will now fail since the new data generated by the cell does not correspond anymore to the reference data.
The next step is to check the validity of the change, and ensure the reference files are updated, or to revert back if the change was unintentional or incorrect.
Compare the temporary files, which represent the new updated component or component test, against the reference files. Inspect the files as discussed in Inspecting reference files. By default, the temporary files have the same names as the reference files except with an additional .tmp extension, e.g.
TestDiskResonatorReference_layout.tmp.gds.When you are sure the new output in the temporary file is correct, you can replace the reference file with the temporary file. This can be done simply by copying the temporary file over the reference file, for instance by deleting the reference file and then renaming the temporary file to remove the .tmp.
Next steps
After setting up initial tests on a library, you can further expand the test “coverage” to test more aspects of your cells, or use advanced features such as test parameterization.